30 April 2014

Suu Photo Gallery


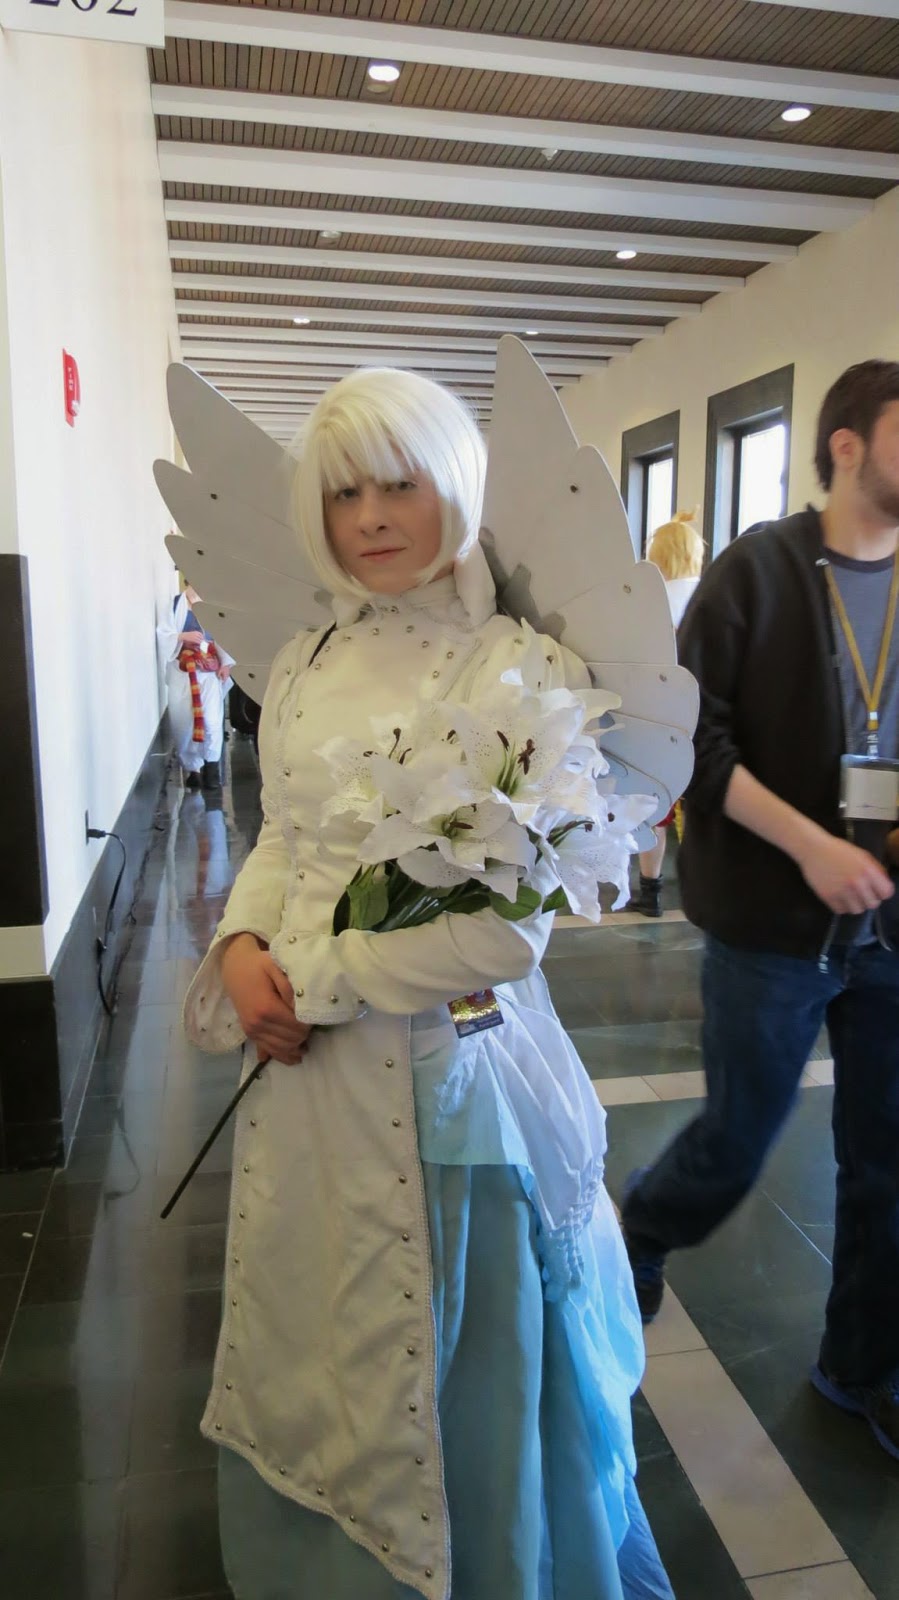
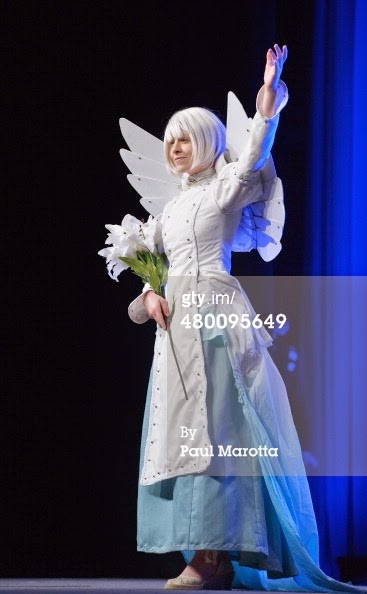
I don't have a lot to say about this costume, except that it was very difficult and didn't really turn out the way I wanted it to.  Oh, I think I came up with some pretty cool ideas.  The dress bodice thing was pretty cool to pattern.  The overall effect was also pretty nice.

Throughout the construction process, I ran up against so many brick walls that documenting it was of such secondary importance--I didn't do much.  All in all, this was a learning process more than anything else.  It was fun to wear, but it didn't do well in competition, and I've come to associate it with a weekend that was pretty unpleasant for a number of reasons, none of which have to do with the costume itself.  It's time to lay it to rest.

I haven't gotten to do a photoshoot yet.  To that end, here are the photos that I have found from other photographers who also attended Anime Boston.

Photo by Paul Marotta of Getty Images
Photo by the Anime Boston 2014 photo booth photographer
Photo by Lala Cosplay Photography
Photo by Mike Tinsley
Photo by MC Radio

13 April 2014

Elsa the Glitter Queen (Part 2)

This is part two of the Elsa progress post I promised you a few days ago!  If you haven't read part one and are interested in doing so, here it is:  Elsa the Glitter Queen (Part 1)

For the most part this post is going to cover the work I've done on my wig, corset bodice, and cloak.  While I have made a great deal of progress since taking these photos, I am going to save that stuff for a future post!

So I don't have photos of the base wig before I started styling it,  but I am working with Arda Wigs' Suzi in ash blonde.  It's a lacefront wig with a widow's peak, so it works beautifully for Elsa.

Because of Elsa's pulled back hairstyle, I had to add wefts inside the sides of the wig to cover any wefts that would be exposed when I pulled the wig back.  This also served to beef up the braid, which is quite bulky.  Briefly I considered adding another pack of wefts to fill it out even more, but this wig already weighs a ton more than I want to be carrying around on my head, heh.

The wig comes with two really distinct layers: shorter hair radiating from the scalp, and much longer hair underneath.  I sectioned off the shorter hair for styling the messy hair on top of Elsa's head.  It won't be part of the braid.  The rest of the hair I sectioned off for French braiding.


Here she is with the braid finished:

It's a little lumpier and messier than I might like.  Ideally I'd like to rebraid the whole thing, but I really don't want to have to face all that hair again x3
We will see.  For now I'm leaving the shorter layer of hair alone.  I don't want to style that until I am sure that this wig won't have to travel flat, and in all likelihood, it's going to have to.

Moving on!

Elsa's bodice is kind of mirage-y.


My original vision was to do it all in dragonscale with some fabric paint or something to take care of the gradient look, but fate seemed to have had other plans.  I fell in love with the idea of overlaying blue netting over blue silk brocade, and that meant I really had to change my decoration approach.  So, embroidery.


Believe me, the silver is extremely difficult to photograph because of its reflectivity.  I built up with wing motif with silver embroidery thread, then added silver leaves and jump rings as accents.

I also wanted something snowflake-y for the center front.  For this one I decided to do the bulk of the work on an embroidery hoop.


Sketching out the design.


Outline.


Finished product.  I used three different embroidery threads in this one: matte silver for the outline, antique silver for the fill, and pearlescent for the accents.  It make an interesting, subtle gradient effect.  Then I added some beadwork and jump rings (not pictured above).

Here's what it looks like attached to the corset:


I added a little mother of pearl ring at the top of the embroidery.  At some point I envision ribbons of embroidery attaching to either side of the ring.

Now then, my cloak.

The main issue with this thing is that it's huge, amorphous, and transparent despite having at least semi-opaque snowflake patterns on it.  I knew pretty early on that I wanted to use this glittery blue netting that I found it New York City, because of its drape and lack of a grain.  That meant I could cobble together pieces of it without worrying about obvious differences in grain direction showing.  I bought four yards of the fabric, to be used jointly by the cloak and bodice overlay.

I wasn't entirely sure what the outcome would be, but I set out using EZ-Steam 2 Lite for the snowflake patterns, which are basically applique, except that I'm applying them to the underside of the cloak.


The pattern pieces are quite large.  First I drew them out on scrap paper, then I traced them onto the EZ-Steam in pieces.  The piece pictured above is actually the EZ-Steam after it has already been applied to the fabric I am appliqueing to the blue netting.  I wish I could give you a better idea of just how MASSIVE these pieces are.  It's about five feet long from top to bottom.


EZ-Steam is wonderful because you just iron it and you've got a permanent bond between the applique and the fabric you are appliqueing it to.  For this application, however, the iron would have come in direct contact with the EZ-Steam through the holes in the netting, so I used pieces of wax paper left over after I peeled the EZ-Steam off it's backing to prevent the applique from getting melted to the iron.

The result:


That took three packs of EZ-Steam, or about fifteen sheets.  I'm completely out of the stuff now, so before I finish up the applique I'm going to need to make a trip to the store.

Here's what we have so far!:


You may notice that the left side of the cloak seems bigger than the right side, and it absolutely is.  I added a gore to that side to help with the amorphous appearance.  The cloak also drapes better on the floor and does NOT look like a bolt of fabric tacked to my back.  I'll be adding a gore to the right side as well.


Without the cloak.  I'll be buying corset lacing later on, the ribbon I'm using here is temporary.


Aaaaaand from the front!  You can see how much nicer the left side of the cloak (with its gore) looks compared to the right side.

Well, that's all I have for today.  Check back later for more!
11 April 2014

Elsa the Glitter Queen (Part 1)

It's been awhile!  I am sorry, I have gotten kind of bad at writing about stuff.

This has been a busy couple of months.  In February we closed a production of In The Next Room (Or the Vibrator Play), and we are prepping to open On the Verge, or the Geography of Yearning in just a few weeks.  Both have been heavy plays in terms of costumes that need to built.

In my free time (which is what you are here to read about...yes?) I have been working on a cosplay of Elsa from Frozen.  You may have heard about it, it's quite popular.

Since it has been a long time since I wrote anything, you can imagine that I've got a ton of material to cover.  In the interest of not making this post too long, I'm going to break the content I've got so far into the two posts, the second of which I'll publish in a few days, maybe even sooner!


I'm definitely going to say that Elsa's outfit falls into the category of things that LOOK simple but are actually really complicated.  What I'm picking out here just looking at this photo is the fact that her bodice and skirt are textured, differently, her bodice appears to have some sort of silver decoration which could be embroidery, and she has snowflakes on her cloak.  She's also got one of those infamous animated cloaks that has about a billion times more fabric at the hem than it could possible have gathered at the top, and no clear grain to the fabric.

Once all that good stuff was figured out and I thought I knew what I was getting into, I went to buy fabric.

Now, one of the things I notice about most Elsa cosplayers is that they just aren't fancy enough.  Would someone highborn like Elsa be wandering around in a plain dress?  I don't think so, and that's even if she made it herself, because she's going to be used to wealth and fancy clothing.  She's the queen, after all.  She's not going to worry about how much fabric was used to make her cloak, and I mention this because most cosplayers' cloaks seem to have been limited by the width of the fabric bolt and that leaves them looking unfinished and unplanned.

I also made the design decision to add an off-white underskirt because the split blue overskirt really needs something for support, to ensure a smooth line from my hips to the floor.


The underskirt idea came from a couture dress catalogue I picked up at the used bookstore.  Clearly I cannot afford this much fabric, nor can I make the pleats that decrease in size as they approach the waist, but to me that had a very Elsa-esque kind of look and it fits in well with the flowiness of the cloak.


Here's what I bought for this project.  I was lucky to find myself in the New York City fashion district during sale season, so I bought silk for the bodice and pleated silk for my underskirt.  Everything else is synthetic.  For the overskirt I bought some French sequined fabric, and for the cloak and bodice overlay I have this brilliantly sparkly blue netting that's woven organically so as to avoid grainlines.

Pinning everything to the mannequin gave a good idea of what everything would look like.  Don't ask about the obvious slant to the top of the cloak.  I was pretty tired at the time.


For the bodice I am using a a Truly Victorian pattern for an Edwardian style corset.  It's got long hips and a tight waist, so It'll work well for Elsa's long torso.  Mine is made in four layers: glitter netting (overlay), silk brocade (fashion fabric), interlining, and lining (same fabric I used for Suu's skirt).  The silk brocade is cut carefully so that the pattern will continue across the seams where possible.  I'm not stressing out about this, though, because the glitter netting obscures a lot of the brocade pattern.


Here's what we have so far on the bodice:


I've cut the white/beige undershirt into the pattern of a basic bodice sloper.  I'll trim the neckline at a later time.

For the corset/bodice, I've cut the front piece on the fold instead of leaving it in two pieces for the addition of a busk.  It's fully boned using cable ties.  Also please note that my hips are larger than the mannequin's, so the bodice will NOT be sticking out like that when I wear it!

I'm going to save the embroidery and cloak patterning for my next post, but I will go ahead and finish this post by talking about the skirt and overskirt.


Clearly this is going to have a huge train.  I gathered all of the sequined fabric onto a waistband, leaving it open on the right hip, then finished the whole thing with a curved hemline.

The pleated skirt is a bit of a riddle.  Its pleats are so tight that I have trouble keeping it from bunching up into a single strip of fabric.  For now its seams are only pinned together, but once those are sewn up I hope that a quick blast from a garment steamer will relax the pleats a little.  I've also considered adding a petticoat underneath to keep the pleats stretched out from underneath.

I'll leave you today with this quick preview of what I've got so far...!


Check back soon for part 2, which will cover the wig, cloak patterning, and embroidery!