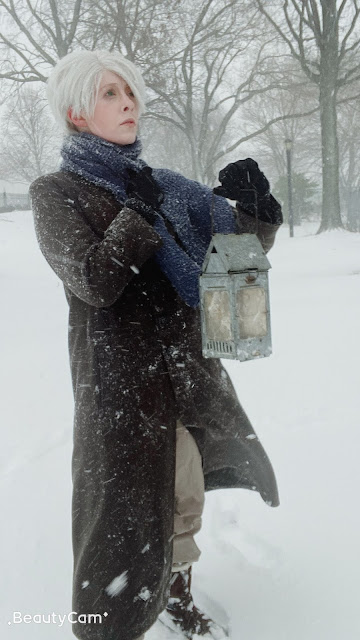
Welcome back! Today's post will be a shorter one but I wanted to dedicate a single post just to this wig project because it involved a lot more structural modifications than my normal wig projects. The rest of the cosplay IS complete and I have done a small self-shoot, so expect process posts for everything else soon.
The first thing I do to most of my lace front wigs is add ventilation to the front hairline. Most factory-made lace front wigs have a good start, but natural hairlines are not so blunt and I like to add less dense, more randomly ventilated hair so that a style that shows the hairline looks as natural as possible. I added a good 1.5 cm of ventilation.
Front hairline ventilating in progress; it is NOT easy to ventilate white hair onto a white head form
This wig was always going to be a Project because side lace part wigs are extremely hard (and expensive) to come by, and there is a good amount of hairline visible on the right side of Ginko's face. A center part would never work because he covers his missing/glass left eye with a fringe of hair. ANYWAY, the way that Arda makes their wigs, the lace actually extends pretty far underneath where they start sewing on normal wefts so they are decent base wigs if you need a lace part.
Notice how the ventilating lace extends even behind the main part of the wig cap
To make the side lace part, I cut away the wefts from where I wanted to make my part. The cut edges can keep raveling, so I stitched them down and added some cut away bits of weft perpendicular to the raw edges, as shown below:
Next, it was simple a matter of densely ventilating the exposed lace. Denser was better for this area because I had wefts that needed covering and after all this was set back a good amount from the front hairline. The finished part, shown below, lets just enough of the wig cap for whatever skin-colored cap I wear underneath my wig show through to look decently real.
Goodness my fingernails were short a year ago
The final major change I made to this wig was giving it a quick dye with FW ink to grey it a bit more. Arda's silver color is a great starting point because it's slightly greyish white but Ginko's hair isn't quite as dark as their light grey color. This had to wait until the ventilating was done because I was at that stage still adding new hair to the wig and it all needed to go through the dye at the same time.
I am afraid the rest of the styling happened in a bit of a whirlwind so I forgot to take photos, but I finished off by straighten the wig and trimming it, a small amount at a time because it would not be good if I cut this too short by accident. This styling is, I think, what a lot of cosplays I've seen of Ginko lack, because he actually does have a somewhat unique hairstyle. It's very short in the front, barely brushing his ears, longer in the back, with much longer bangs on the left side to hide his eye. It's not a style that can be bought in a bag and his hair is very straight with a somewhat lank texture. Plastic has its limits, of course, because it's anything but lank.
That is it for now! I did just post my Ginko photo gallery, so click over there for a small number of photos that I took during a snowstorm last month in addition to the phto I used as a header for this article.


