15 September 2017

Doctor Poison Photo Gallery

Wonder Woman was the first superhero movie in years that piqued my interest and it was, I think, well-deserved.  No one can claim in was perfect.  But it was what we all needed.  Anyway, for as awesome as Diana was, as soon as I saw Doctor Poison I was intrigued.  She's the most interesting villain in years and her design was so interesting and immediately I was like, "her.  I want her."  Of course I was then disappointed with very little background and only a few short scenes in which she appeared.  Bring her back, please?

Anyway, I have to admit that I prefer her evening suit to her lab outfit, but the patterning for that suit is unfuckingbelievable so I decided to let myself mull it over a little before trying to draft it.  The lab outfit was far more doable in the mean time.  Mine is all wool and topstitched to within an inch of its life.  I'm still having trouble with gape in the front because the wool has a bit of stretch on the bias.  As much as I wanted to avoid it, I may need to redo it with an interlining to stiffen things up properly.  The mask was probably the trickiest part.  I'll probably make another soon, but the first one was a plaster base covered in paper clay, which I think turned out a bit thicker than I would have preferred.  I'd like to use a material that's a bit more plastic if at all possible, because both of the aforementioned materials are rather rigid and crack easily if I'm not careful.  I must say that Xtra Hold Spirit Gum has been a lifesaver because that shit DOES NOT MOVE all day long.  It's glued just as well when I get home as when I put it on.  So that's a relief.

The hood was a fun thing to challenge and I didn't get it quite right, but it's fine.  It was a really strange pattern to draft so that I would get those two sharp points on either side of the head.  The inside is already all covered in makeup because of the logistics of putting this costume on.

My greatest stroke of luck was finding the EXACT goggles that were used on-screen.  The vintage goggles were a chance find on Etsy.  Good luck to any of you trying to find a similar pair, I wish I could direct you in the right direction.  Unfortunately, they were the only pair available and I had to get them shipped from the freaking Ukraine.

Another vintage element: the boots are authentic, probably early 20th century.  I've had them for years and finally got them re-soled so I could wear them with this costume!  And as an everyday pair of shoes of course.

I'd like to make you all a tutorial about how to make the mask.  Stay tuned.  But understand that I am quite busy and it could be awhile even with the best of intentions.


03 September 2017

Amira Process Post

Embroideries
Everything about the embroideries on the coat and cap were fairly straightforward.  The dominant threads are cotton DMC interspersed with antique French metal threads.  There are also glass beads. steel paillettes, mirrors, and metal sequins.  I wasn't as savvy about taking photos at the time, but I hope the below photos will give you some idea about the embroidery process for Amira.


I embroidered the steel paillettes using an Indian shisha embroidery technique because, honestly, it was what I could find out how to do.  You need to create a structure, seen above, to provide a base for the shisha embroidery lattice and also hold the paillettes in place while you work.


Antique French metal threads were couched to create outlines on the cap and yelek sleeves, as seen above.  The ends of each line of metal threads are punched through to the wrong side of the fabric to hide them. 


As seen above, the finished kaftan and hat have appliqued strips of red wool over the black wool base.  Cotton embroidery threads created the base for the "lattice" of silver metal threads that are looped to create Amira's zig-zag pattern embroideries.  As a side note, it wrinkles like nothing else, and I've had to iron it with vinegar every time prior to wearing it. You may notice that the sleeves (pictured above prior to lining) are slightly tapered at the cuffs, something I noticed on many extant kaftans from the nineteenth century to the modern day.


The hem of the shift was a damn nightmare to embroidery because I freaking had to choose to the lightest cotton voile available at Mood, which of course clung to my trousers and bunched up under the tension of the embroidery threads.  I tried three different embroidery designs before settling on one and getting the tension right.  The couched metal threads made a huge amount of difference in the cling issue by weighting down the hem a little, and I daresay the metal sequins did as well, though it was hard to dip into my precious stash of the latter that I was lucky enough to snag when Tinsel Trading Company had to close their NYC shop.  At the center of each metal sequin I stitched a glass Delica seed bead for a little extra sparkle.


The yelek sleeve embroideries were a pain to design because the proportions were so easy to get wrong.  I drew them out on Coroplast, which, when placed on top of a lightbox, could be used to trace the designs onto the sleeves.


Honestly, my first impulse was to paint rather than embroider the yelek sleeves.  You can see the initial painted sleeves compared with how they look after I embroidered them.  The embroidery, I think, was a much better choice.  Each sleeves took four nights, or about twenty hours, to complete--and that's before even assembling the yelek!

Jewelry
Making the jewelry was primarily a story of finding the correct beads to create the proper aesthetic.  I sourced beads from Turkic countries where possible/affordable, including the prayer box and large bicone beads on either side of it.  The coins were tricky to locate as well because most commercially available coins are for belly dancing and look absolutely fake.  These coins are Burmese from the 1960s and were a chance find on Etsy.  I compromised on the fact that they were too new and not geographically appropriate with the fact that they look perfect.  Pictured below is the prayer box necklace with the triangular beads intended to be made into Amira's earrings.
Leather
Most of these pieces remain works in progress and have not been photographed in their entirety, but I present a preview here.


The above quiver was cut out of leather and tooled with a swivel knife.  It's rather a beautiful piece, though I must admit to some disappointment that the leather paint seems to have so thoroughly overwhelmed the tooling.
I must once again apologize for having taken relatively few photos while I was making this costume.  The honest truth is that I began posting Instagram around June and prior to that received mostly lukewarm responses to photos I posted on my cosplay page on Facebook, which just wasn't the right platform for progress shots.  Now I wonder if I post too many photos!  Anyway, here is the end result:


Amira Conception

The Bride Stories manga is set in the Turkic nineteenth century.  I suspect that author and artist Kaoru Mori was intentionally vague because the story doesn't like to get hung up on sociopolitical details, and I can hardly fault her for that, but it has necessarily made my job a bit more difficult with regards to figuring out how to build the costume.  The fact is that, even though I am a costume historian, I have no Turkish heritage and prior to beginning this costume had no particular knowledge about Turkic/Ottoman costume history.  It is therefore extremely important to me to represent the region's rich history in a respectful manner with regards the current political and humanitarian issues that have sunk the region increasingly into wars and crimes against humanity.

The author of the manga appears to have avoided, as I said, specifying the specific geographic region in which the story takes place.  It's hardly relevant to the story, but the reader should be aware that the "Turkic region" is in reality a collection of highly diverse cultures with their own histories and traditional costume styles.  I drew heavily on traditional costume from Yemen as the closest match to the series artwork and used extant examples of garments from the Ottoman Empire to fill in the gaps.  I made some design decisions that deviated from the series artwork because I am extremely wary of cultural appropriation and the necessity of respecting cultural heritage.  Here is a discussion of what design decisions I made and why.

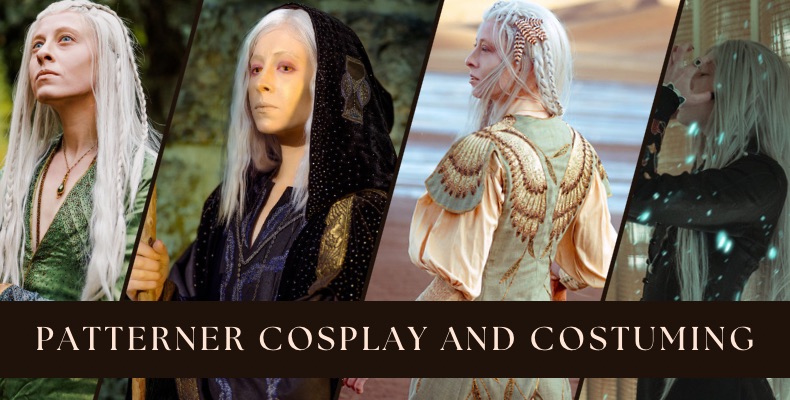
All artwork is attributed to Kaoru Mori.


Kaftan (outer coat): This is the closest term I could find for this garment.  It is a semi-fitted coat that flares below the hips with the use of gores.  I eliminated the slit in the back of Amira's because I couldn't find a single real-world example with such a slit.  Honestly, in making the garment, not having it also significantly improved the drape.  Also, the sleeves were traditionally rectangles, buttoned instead of seamed, that were simple stitched straight across the shoulders.  Amira's appear to be more tailored, but after trying both styles in mock-up I once again decided to deviate from the series artwork and maintain the traditional garment construction.

Yelek (Vest/inner coat): Again, this is the most analogous real-world garment in existence.  They were an inner garment generally worn under something like a kaftan and may or may not have sleeves or a collar.  Nothing I see in museum collections has a collar configuration quite like Amira's and most either lack a closure or have extremely showy button closures, but in this case I decided the look in the series artwork was essential to the costume.  I kept it and the hidden center front closure.  Honestly I have no idea what's going on with the sleeve embroideries.  They're not traditional at all, so I'm not sure what they should actually look like, but I'll do my utmost to reproduce them in goldwork embroideries.

Shift/underdress: The skirt of Amira's shift appears to have an impossibly large circumference.  I looked at several patterns for Ottoman garments in the nineteenth century and couldn't find anything quite like it.  I stuck with the historical pattern and drafted the gores to flare as much as possible to achieve maximum circumference.

Hat: This is a fairly easily-understood piece.  The embroideries on Amira's hat are not really traditional, but we must go with the artist's intent on this one.

Jewelry:  These pieces are fairly well-documented in history.  The long cylindrical bead initially confused me, but I found out that it is a prayer box and quite a standard piece of jewelry in the Turkic region.  It was surprisingly easy to locate one that looked almost exactly like Amira's.

Shoes:  *shrug* are we in Mongolia?  Turned up toes aren't really a Turkic thing, but okay.  What should these even be made out of?  Leather or felt are options.

Trousers:  Nothing complicated about these.  The nineteenth-century Ottoman cutting patterns are perfect.

Head wrap: HAHAHAHA who knows.  I can find head wraps that drape over the head.  I can find ones that wrap around the head.  Ones that tie on top of the head?  Not so much.

That's it really!  Writing this after finishing most of the costume, I can attest to just how difficult it was to draft the patterns for this costume.  I've never seen photos of these exact types of garments being worn together, and perhaps for good reason, with how tricky it's been to get them to lie properly when worn together.  That said, the research stage was certainly fascinating and I would definitely categorize this as a project that taught me a great deal about historic costume and the fact that, while it may look perfect in documentation, the reality of clothing is that it isn't always as easy to wear as it appears.

27 July 2017

Sybill Trelawney Photo Gallery


I like Professor Trelawney. I think she's somewhat unfairly maligned. As someone who can come off as excessively eccentric myself, I sympathize with how she's come to have such a fraught relationship with the world around her.  So I cosplayed her.  My favorite part of the costume is the sleeveless overcoat that she wears in The Deathly Hallows Part 2, so that's where the lion's share of my references come from.

Shall we start with the sleeveless overcoat?  I made mine out of boiled wool.  Hers must be wool, too, but I couldn't find anything with a similar geometric star motif, so I made those myself with a stencil and discharge paste.  The boiled wool was a calculated choice on my part, as it looks to me like the original overcoat has raw edges and is unhemmed, meaning the textile cannot ravel along the cut edges.  Boiled wool is woven and then felted, so it's well-suited for this sort of thing.  My mother was kind enough to spin the wool yarn I used to blanket stitch the edges of the overcoat.

My tunic is made of a beautifully-woven "coarse" silk.  The original has vine patterns on it, but I came to the conclusion that these were machine-embroidered on the yardage before the garment was made rather than hand-embroidered.  I couldn't find anything similar, and much of the tunic would be covered, so I only embroidered the sleeves.  The tassel fringe was a lucky find in that it matched the color of the silk perfectly.

To emulate Professor Trelawney's wild curls, I tightly curled a straight wig and then saturated it with pomade to help the curls maintain their definition.  There's some frizz to her hair, but not a huge amount, so I wanted to make sure that the curls wouldn't break up too much with wear.

The tunic and overcoat have since become one of my favorite winter ensembles.  There is nothing like wool and silk to keep warm during northeastern winters!

Progress posts:
Making the Impossible Possible


Dr. Mary Edwards Walker's Reform Ensemble

I made this ensemble based on a photograph of Dr. Mary Edwards Walker from 1864 when she visited England and met with Queen Victoria.  Dr. Walker was a dress reformer from a progressive family.  Her father stipulated that she would not wear corsetry as a child, and she continued to eschew it as an adult, instead choosing to join the American Dress Reform movement.  She worked for several years with Dr. Lydia Sayer on The Sibyl, a feminist dress reform newspaper during the 1850s and 60s.  She later rejected conventional feminine clothing entirely and from the 1870s onward wore exclusively men's suits.

My version of this dress is for summer wear.  The textile is a dual-toned cotton (tan warps, teal wefts) with dual-tone silk trimmings.  I drafted the pattern for the dress based on princess-line dressmaker's patterns as well as measurements from an extant 1860s bodice.  The trousers were drafted in a similar manner using measurements from a pair of 19th century men's trousers in my personal collection.

The completion of this ensemble comes close to a year after I became a scholar of 19th and early 20th century dress reform.  I found through my research that dress reformers refused corsetry but were not averse to boning in their dresses.  My dress has six bones to maintain its smoothness over the waist.

In the photographs below I have accessorized the dress for a later date, c.1880s.  The event I was at tended towards the latter part of the 19th century.  Though I am undoubtedly too young to accurately represent dress reformers in the later 19th century, the truth is that lifelong dress reformers lived into the 20th century and adhered to this style of dress until their deaths.  Dress reform was not fashion-averse and photographs show that some dress reformers stayed abreast of fashion trends as long as those trends did not disrupt the core principles of dress reform, that is, health and ease of movement.

In other photographs Mary often wore her hair in tight curls, completely unbound or in a part-updo.  I chose the latter to provide the support my hat requires to be worn properly.

  
Photo on left by Elisa Libratty, photo on right by Kathy Libratty
Photo by Kathy Libratty

Amira Photo Gallery


Amira was my entry in the Anime Boston 2017 masquerade.  It was another complex build that I tried to squeeze into too little time, but I was so very fortunate at how well it turned out.  I did not sleep the night before the competition for trying to get every last stitch of embroidery completed in time.  The work paid off, as I won first place master division craftsmanship, the second-highest craftsmanship award in the competition.  This is one of the toughest competitions on the east coast, and I am so excited to have taken home one of the top prizes!  She later went on, after many more grueling months, to win third place in the needlework category at New York Comic Con 2017.

The character of Amira, from the manga Bride Stories, is a 19th century Turkic woman from an unspecified region.  Though in an arranged marriage to a boy much younger than she is, she is an independent woman who frequently does other than she ought to.

I was wary of cultural appropriation/exploitation when approaching this costume.  Since there are so many regional costume differences in the Turkic region, and I lacked the benefit of knowing from which region Amira hails, I conducted general research into the cut and construction of Ottoman garments.  This allowed me to draft all my garments as close to the way they ought to have been as possible.  That meant introducing some changes to the original design.  One such change can be seen in the hang of the sleeves.

The entire costume is hand embroidered using cotton embroidery thread, synthetic and metal thread, glass beads, metal passing, mirrors, and steel paillets.  I received copious compliments from the masquerade judges about how neat my embroidery is on the reverse.

As much as possible I adhered to materials that would have been available in Turkey in the 19th century.  The coat and hat are wool, the underdress is cotton, and the pants, vest, and scarf are silk.  The boots I also made.  They were drafted, like the other garments, based on cutting layouts of Ottoman footwear, tooled, wet-molded, and tinted.  I should be clear that, as I had never made a pair of boots like this before, the outcome was pleasing and wholly comfortable.

In the photos below you'll see a progression of changes in the costume, from its first iteration in April 2017 until the final stage of completion in October of that year for New York Comic Con.  This encompassed an enormous amount of additional embroidery, my bow, quiver and arrows, a 12-braid wool quiver belt, a complete remake of my necklaces, new triangular side pieces on my hat, and the decision to double French braid my own hair in place of my original wig.

(You'll have to excuse my lack of photos for the moment, as of December 2017 New York Comic Con has yet to post their official masquerade photos, of which a great deal were taken and among which I hope are some excellent ones!)

Photography by David G. Whitham/DGW Photography
 Left: Photography by Andrea Pierce/SDE Photography
Right: Photography by Rodrigo Ramirez

Left: Photography by Rodrigo Ramirez
Right: Photography by Madd Joey


Yelek, finished at top, interior and detail photos below
Click to enlarge

Chemise, front and back

Left to right: Handstitched finishing inside cap, beaded edge of headscarf, braided ties at center front closure on chemise
Click to enlarge

 Left to right: short necklace, prayer box necklace, 12-strand braid hair tie and quiver belt
Click to enlarge