Some of my readers remember that Undertaker from Black Butler/Kuroshitsuji (depending on if you prefer the English translation of the title or the romanization) was one of my early cosplays, circa 2011 and 2012 and, I think, one of my early costuming projects where I really pushed my skills. It was relatively successful too: since I debuted it right around the time that the manga was Heating Up again, the character was experiencing a surge in popularity and I even won a minor craftsmanship award. It was the second time I had ever won, so I would say that it was a big deal.

Then Yana Toboso published this image and I was hooked:

I do love artbook versions of characters. Anyway, it took me many years, but in early 2020 Anime Boston was on the horizon and I was booked one more as a craftsmanship judge for their masquerade and I needed a nice cosplay to wear onstage for the awards presentation and Undertaker was going to be it. Unless you have been living under a rock, of course we all know that COVID-19 canceled conventions for most of the year and Anime Boston was no exception but I went ahead with my plans since I had by that point already bought fabric and embroidery supplies. In early March I packed the whole thing plus my sewing machine into a bag and flew to my parents' home.
The build process for this cosplay will span multiple posts, because now almost year later the cosplay is still in-peogress along with many other exciting projects that I hope to write about soon. Right now I will fully cover the embroideries, which have gained a decent amount of interest since I have been showing my processes on Instagram!
The base of any cosplay is research. Undertaker wears a cassock-type garment and lives in late 19th century London. We can discuss his clearly supernatural origins, of course, but fabric choices for this type of garment in this time period is clear: it's going to be wool. I will talk at greater length about drafting/patterning Undertaker's cassock, which raised a lot of fit issues, so look forward to that. About a month before New York City shut down, I chose this beautiful wool from Mood:

Fortunately for me, there is very little left to the imagination for Undertaker's sleeve embroideries except that the button closure along the outside of the arm clearly does not merge with the rest of the embroideries, meaning I would need to design a border.
After fitting the sleeves, because unlike a normal cassock sleeve, Undertaker's are very fitted, I cut the sleeve pieces from my fabric and drew my first row of embroideries. I did all of this using measurements because I forgot my tracing paper when I packed to fly to my parents', but it's relatively easy to do this with a repetitive pattern. I started by drawing a series of parallel lines, measured along them to find the points where the designs needed to intersect with those lines, and then drew in the rest of the design freehand. The first was a row of fleur de lis.

For the gold outline, I chose a material called "kinshi" that's sold primarily as a stringing material by a local New York City bead shop named Toho Shoji. For couching around delicate shapes like this, it can be a better choice than more traditional types of passing or Japan thread, which have a metal or lurex lamella (wrapping), due to its flexibility.
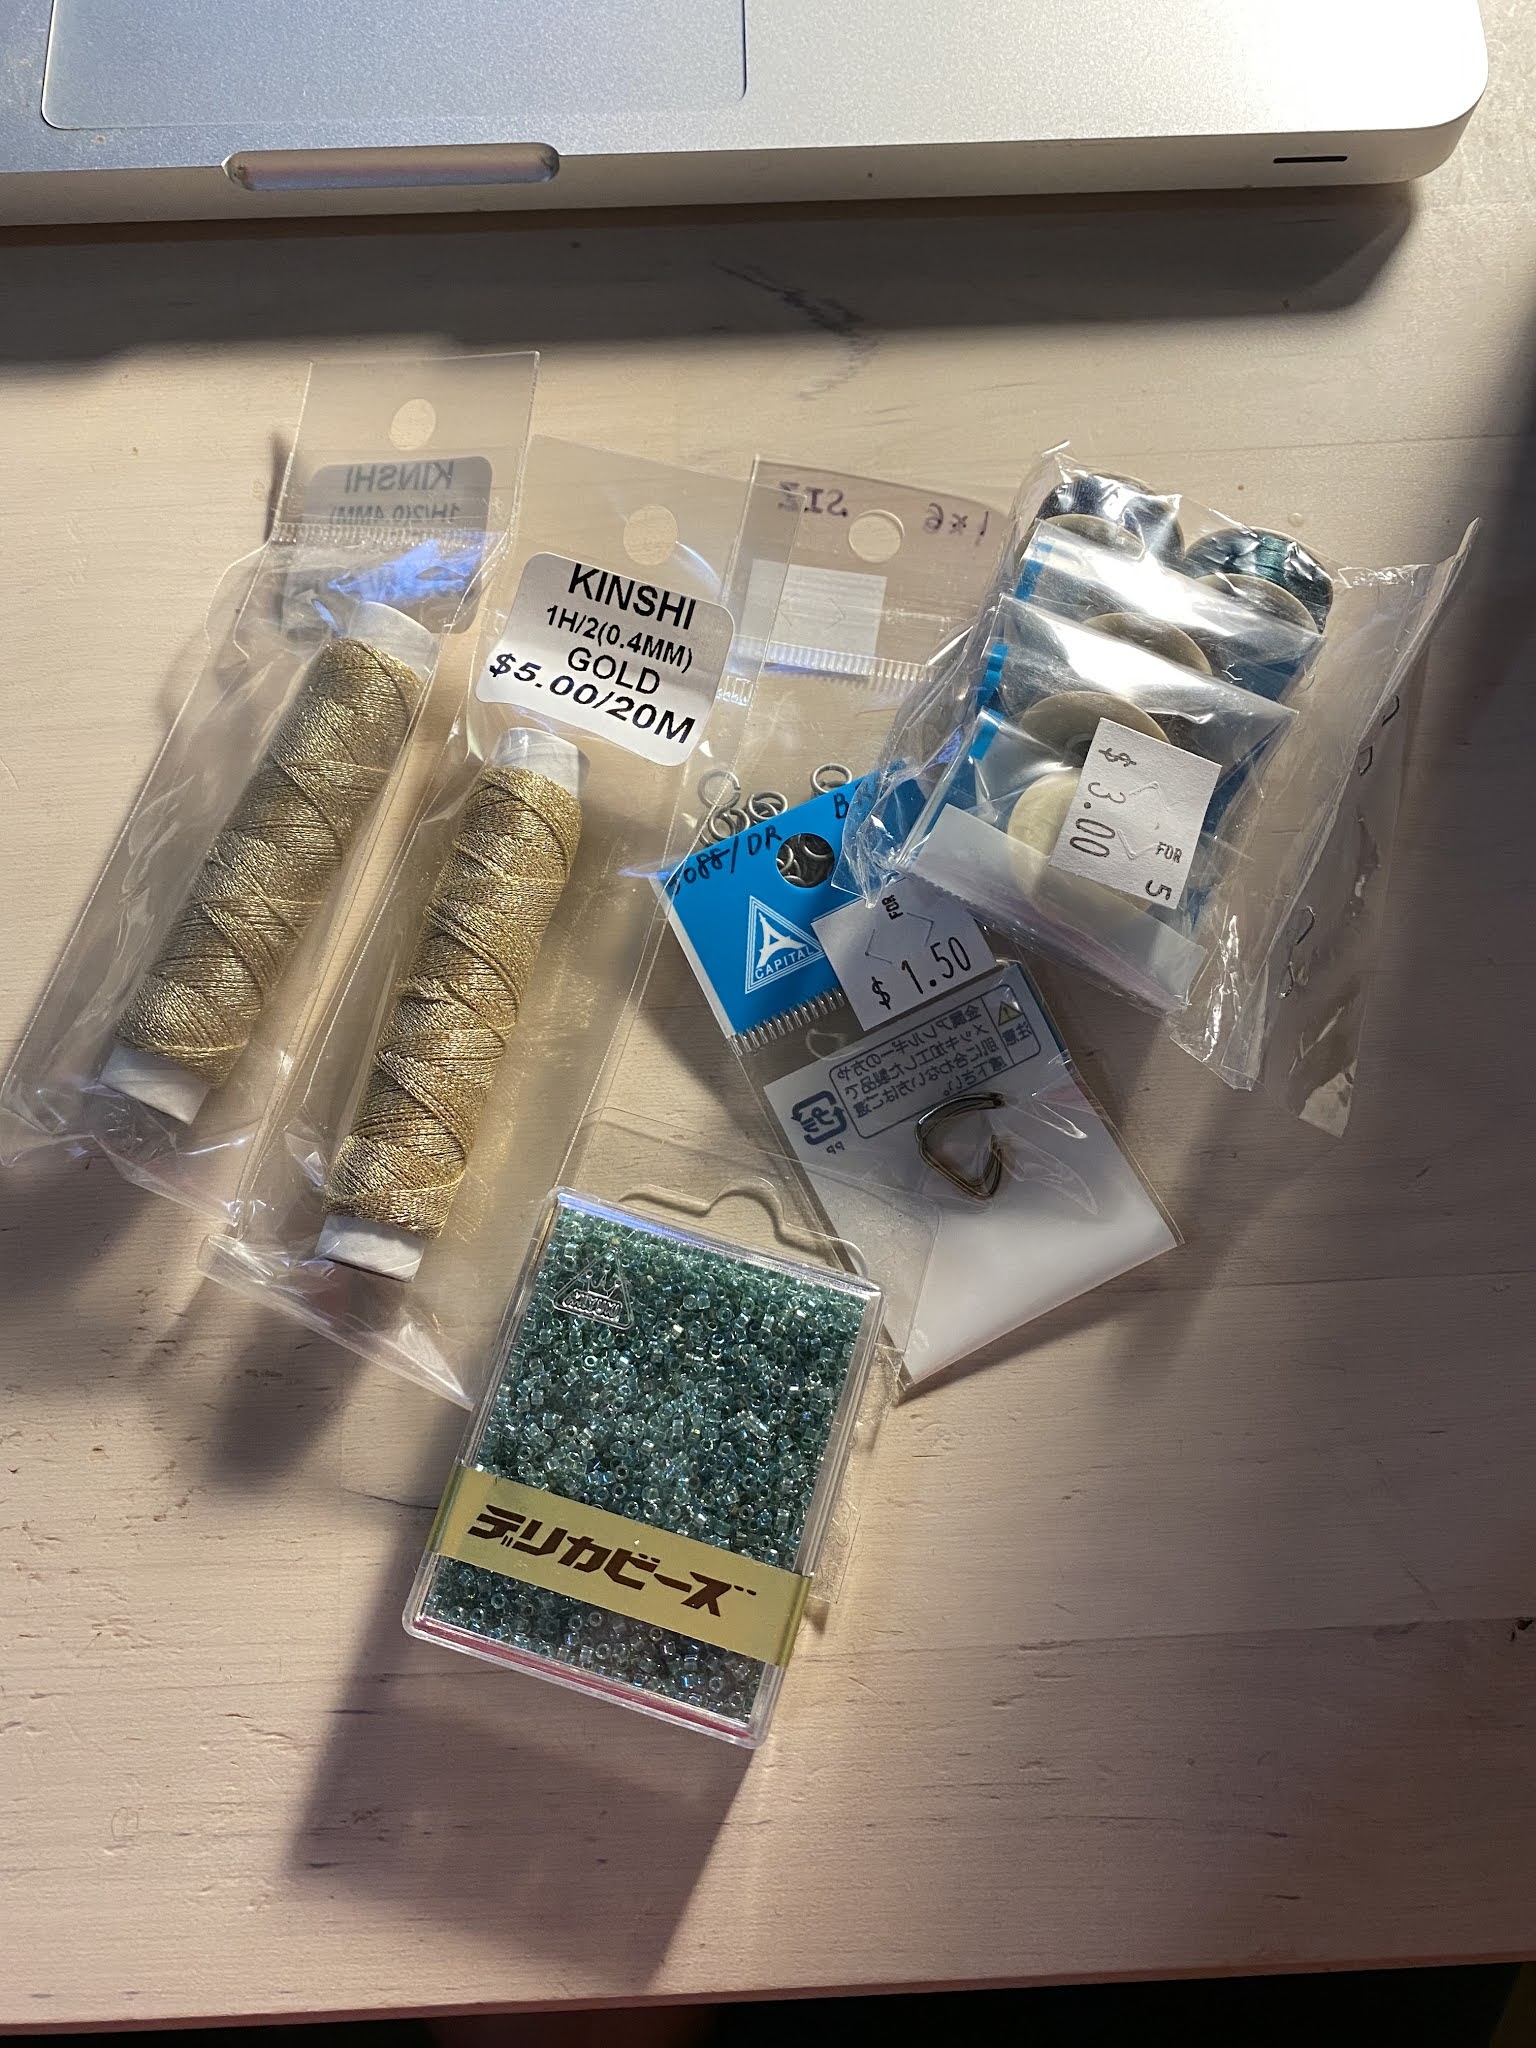
Also from Toho Shoji I had several boxes of Delica seed beads in appropriate colors for filling in the shapes in my embroidery. Beads, however, were not the first thing I tried out for this. More traditional embroidery methods from the nineteenth century would suggest something like crewel embroidery, which would be worked with thread (typically wool). And to my credit, I did test this using DMC cottons to see how it would look, but it wasn't sparkly enough. It looked too flat and not luxurious enough compared to the artwork I was re-creating. I love Delica seed beads for their perfection and shine and their dimensionality proved perfect for the project. As an aside, the gold beads are 24K gold-plated! That may seem extra, but for Delicas they actually don't cost that much more than the other colors and the way they reflect the light is unparalleled.

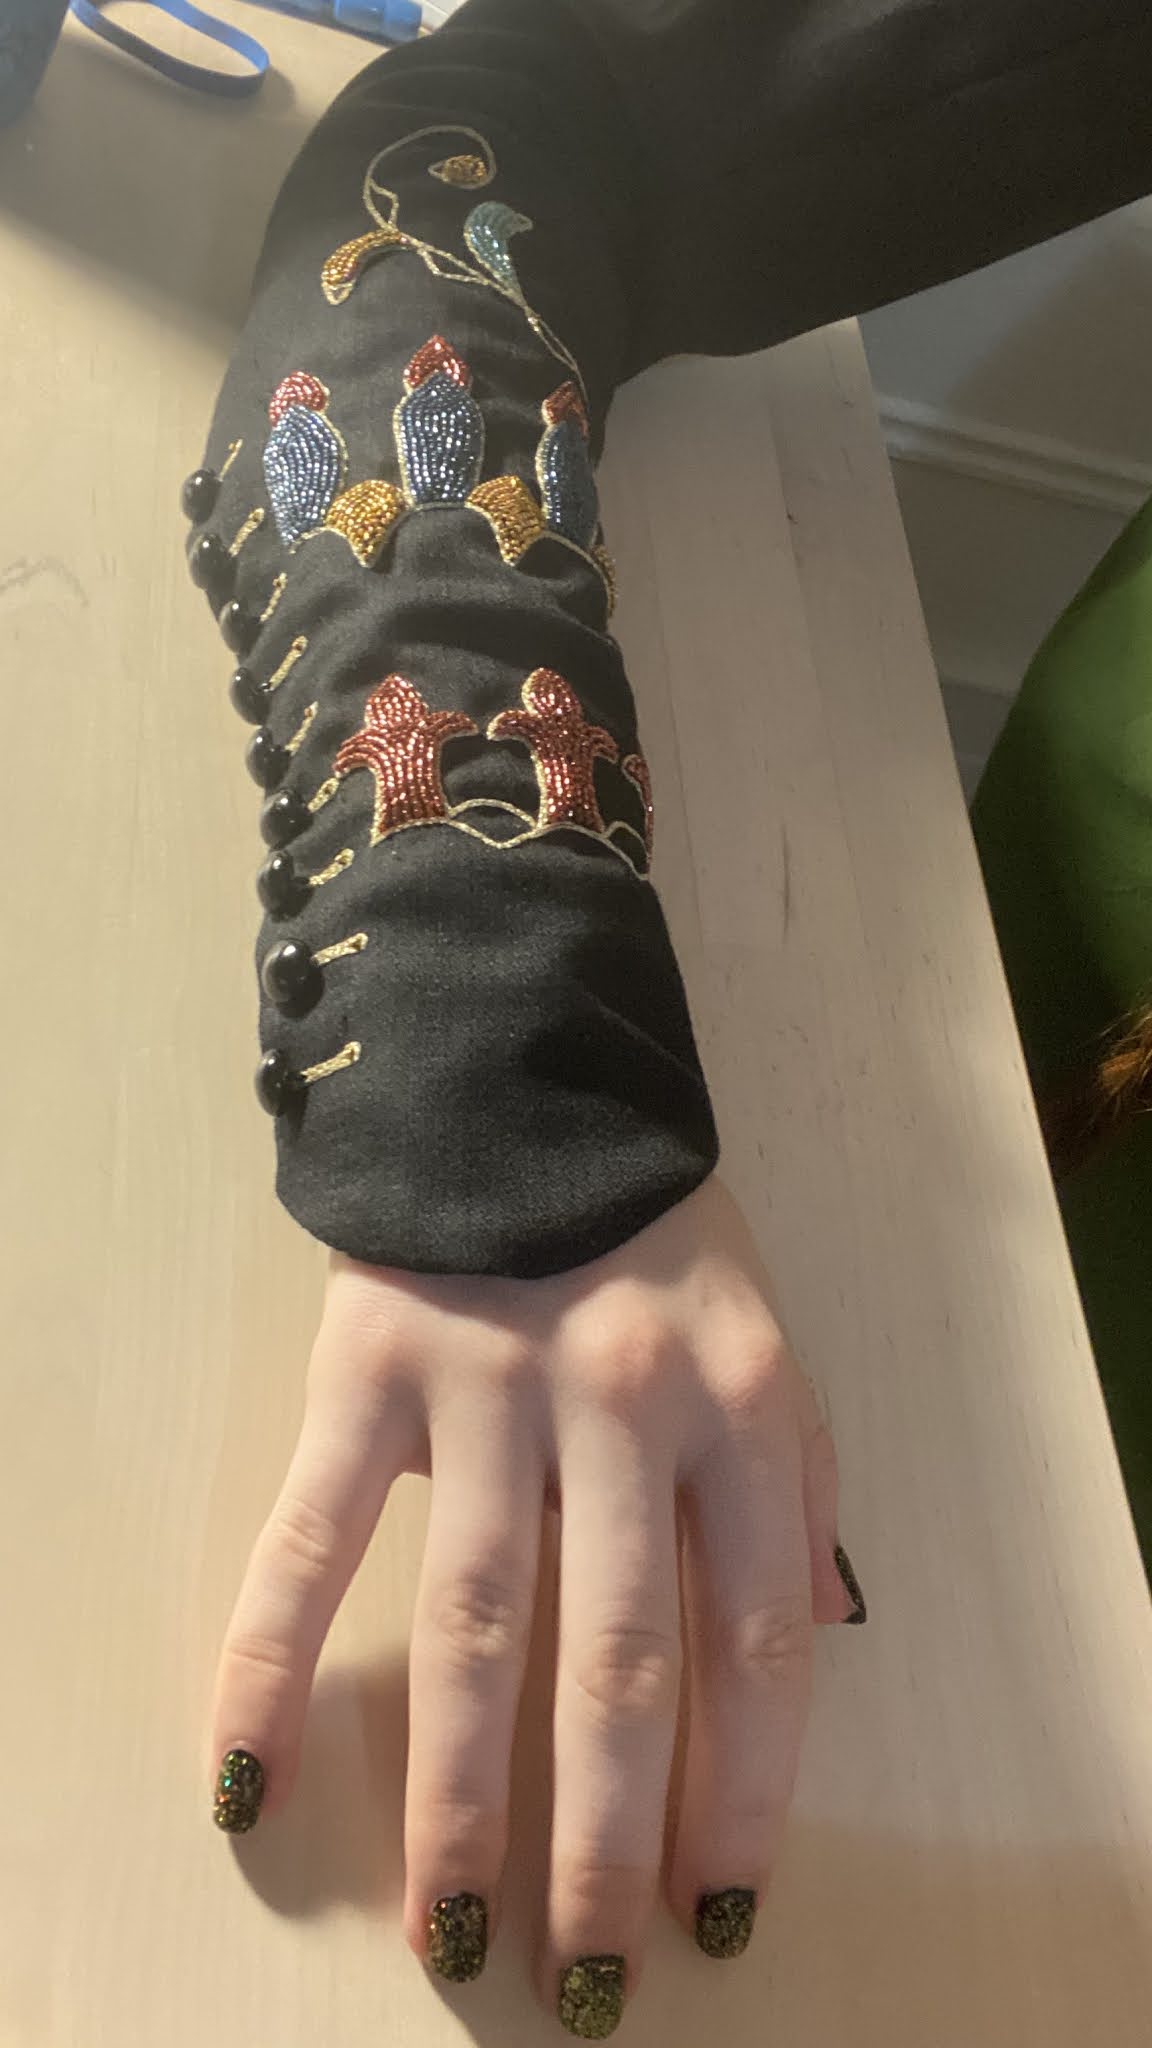
I worked the sleeves in two pieces each for as long as I could because the embroidery WOULD extend across the inner arm seam and yet the project would become more unwieldy to embroider once those seams were sewn. That meant I did as much of the couching and beadwork as possible before sewing those seams, AND I started to address the outer arm button closure, as seen in progress in the above photo.
Through experimentation, I quickly realized that a real buttonhole closure along the cuff and outer arm would not be possible if I wanted the buttonholes to look as perfect as they do in the series artwork. Military garments from the 18th and 19th centuries set a precedent for this type of this, though, because they often featured decorative closures that either covered another type of closure or were completely false. I DID need a closure to get these sleeves over my hands, so I chose an embroidered button closure over a functional hook and bar closure. To do this, I worked each "buttonhole" out of the gold kinshi, then punched the ends through to the other side using an awl.

After the awl is used to create a hole, I thread a piece of strong thread through that hole from the back, loop it around the ends I need to bury, and thread it back through the hole. Assuming you do not accidentally catch any warps or wefts of the fabric, this will pull the ends of the kinshi clean through, "burying" them.

Antique buttons ready to be stitched into place; as you can see, I originally designed a flourish for the bottom of the embroidery, but I had to remove it because there wasn't space and it looked too crowded
Next, I used the awl to punch a hole so I could push the shank of my button through the fabric and sew it in place on the back. My buttons are antiques, by the way, dating to the late 19th or early 20th century. The result is a simulated buttonhole closure that will never pucker or pull on itself!

The button shanks are stitched in place
Here is what the final and complete embroidery design looks like:

I worked the buttonholes along the center front closure of the cassock body exactly the same as I did the sleeve closure.

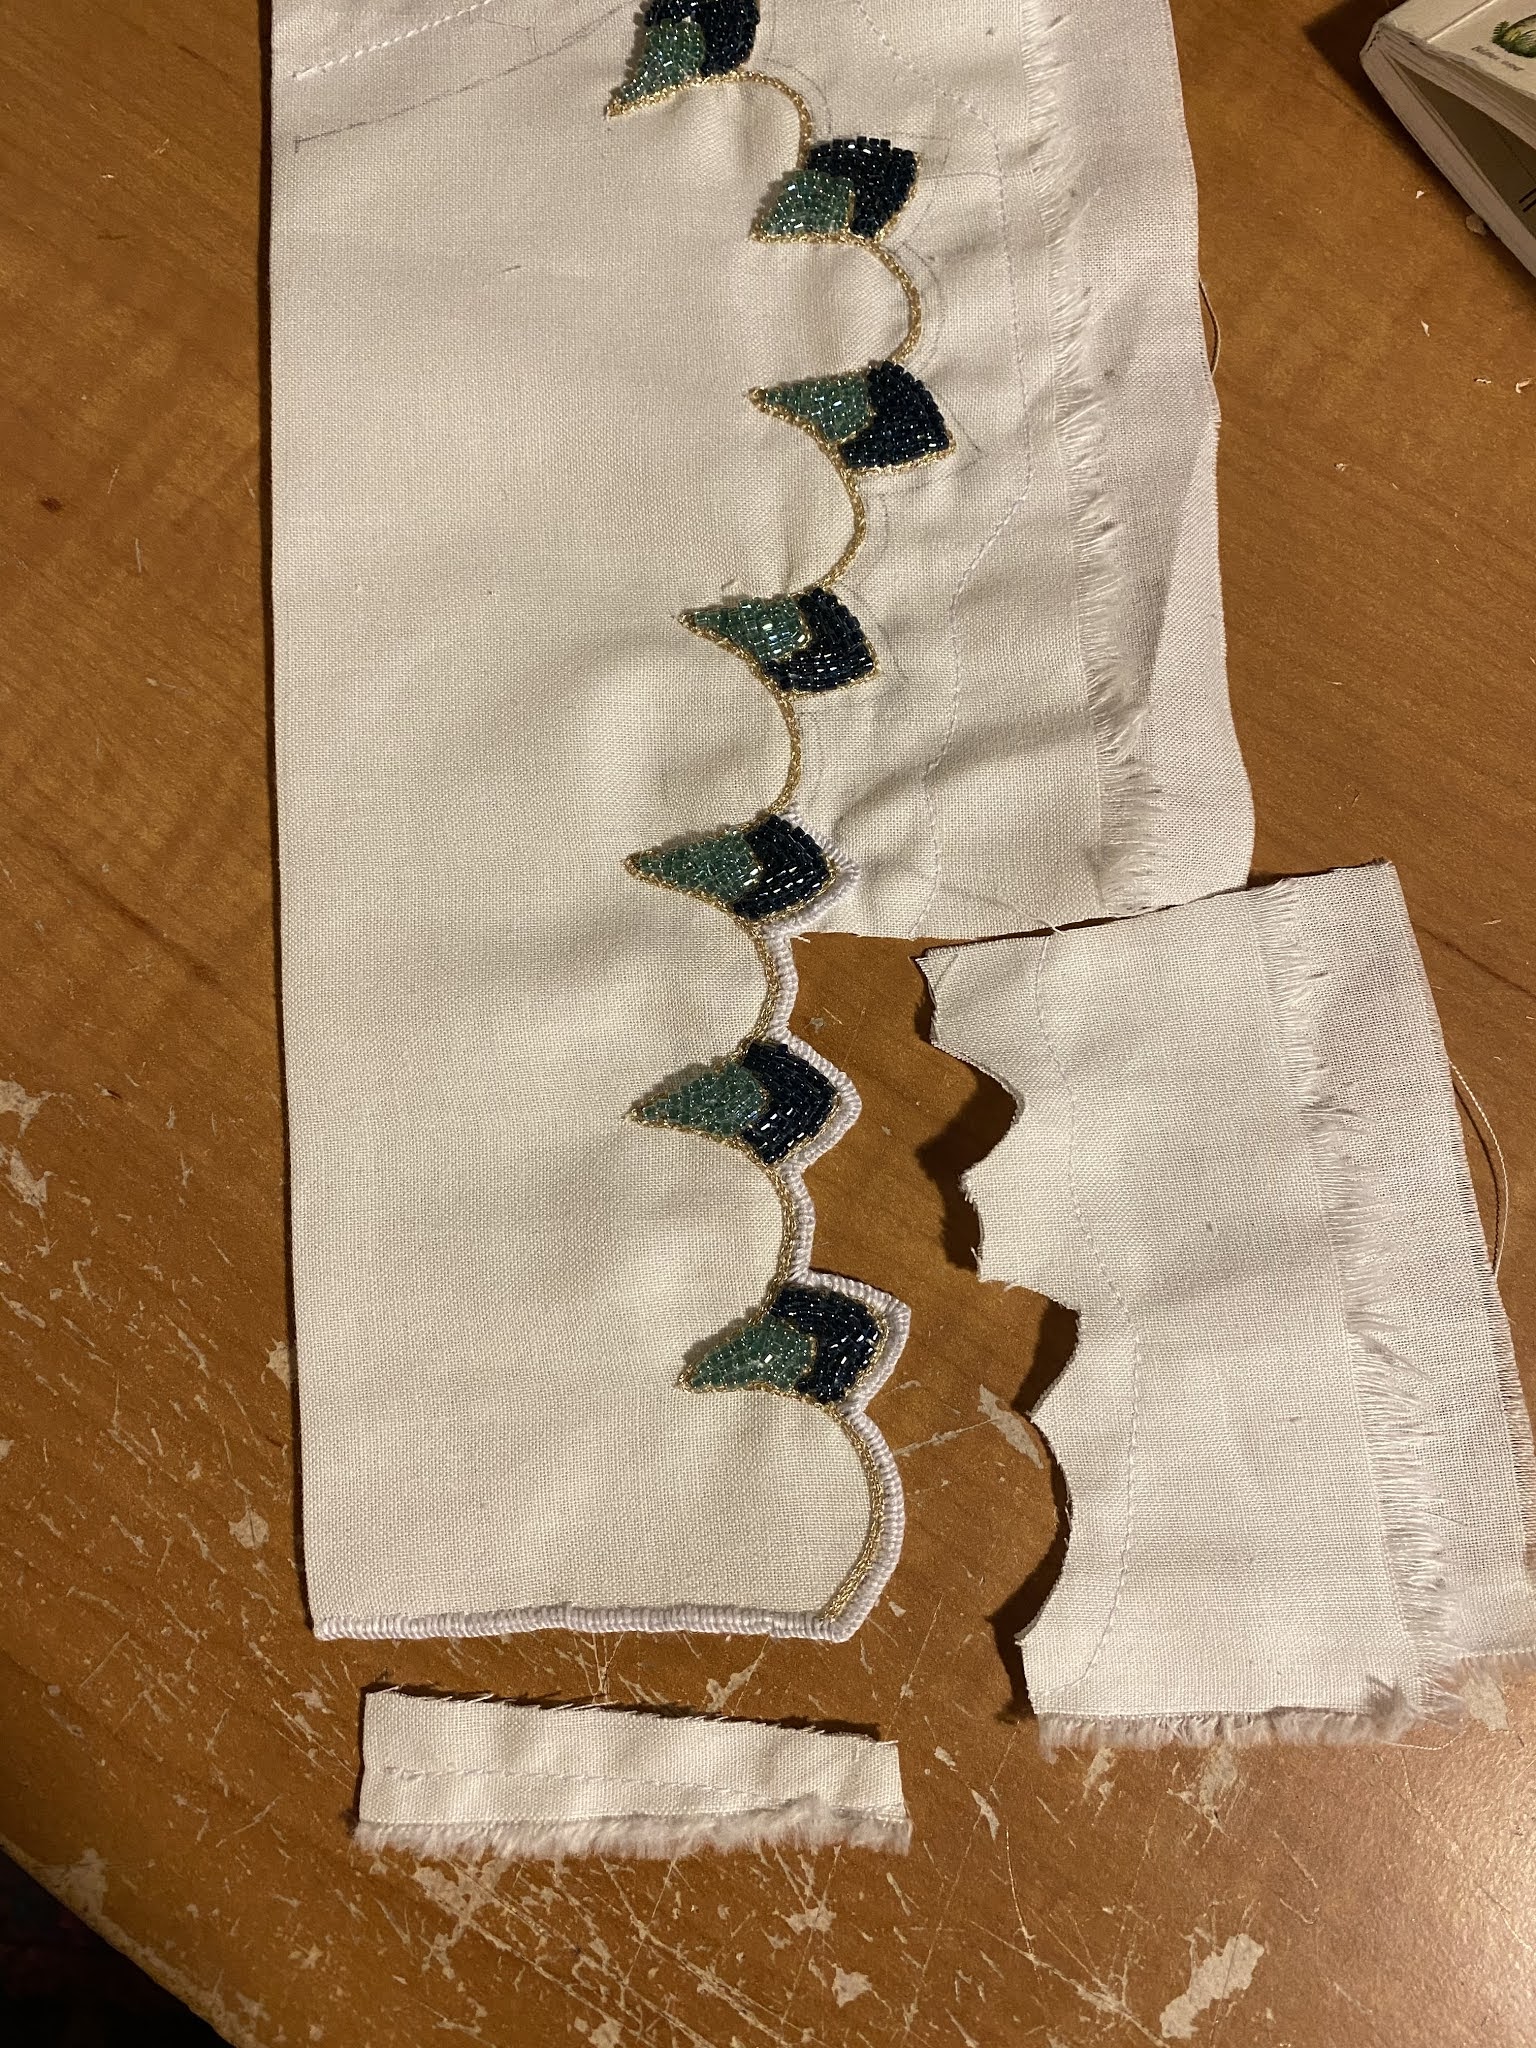
Before I reveal what the costume looks like in its current state, there is one more piece of embroidery for me to write about, and those are the little lace cuffs. I actually wanted to try making a lacy edge like this since I read how the technique works in a 19th century dressmaker's manual. Basically, you do it by working buttonhole stitch along the edge that you want to cut (NOT blanket stitch, this is VERY important), and then you cut along that edge, which will be very stable and durable.
First I worked the couched and beaded embroidery for the cuffs:

Couched embroideries

Beaded embroideries
Then I folded the fabric in half to encase the back of the embroidery, and basted the open edge together:


When working the buttonhole stitch, it should form a small lip on the right side, which is why it's such an aesthetically pleasing edging technique. Cutting the excess fabric away is relatively simple, too, because of the lip.

Cuffs paired with the sleeves:

(I had to re-press the sleeve hems a few times after this so they didn't have "peaks")